
You've chosen your personalized plate settings on your Reviver app. So now what?
Follow the steps below to update your digital plate:
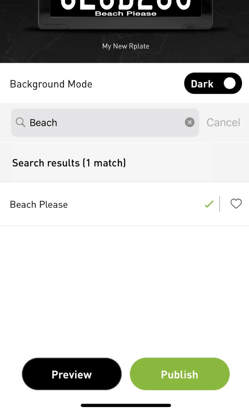
- Step 1: Once you've selected your plate background (and message, if you choose to do so), you'll tap the green
 (Publish) button within the app. You'll then probably see a message letting you know that your plate will update shortly (2nd image below).
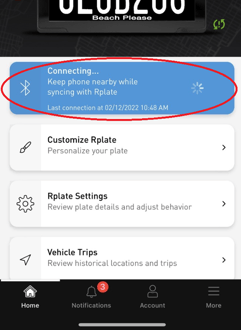
 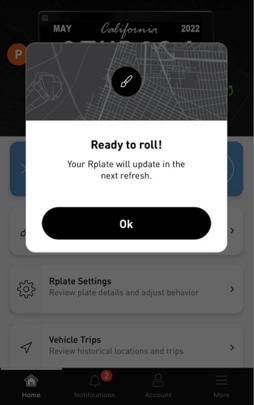 Step 2 (if you have a battery-powered RPlate): Once you are standing near your RPlate, your Reviver app should automatically initiate its "connecting" mode (see third image circled in red below). You should then see your app connect and push your updated plate image to your digital plate.
If the app doesn't automatically begin to attempt a connection to your plate, tap the blue "Connect RPlate" button to begin the connection process. Be sure to be near your plate when you try connecting to it.
If the app still doesn't connect, briefly press and release the home button on your RPlate (circled in red below).
or...
Step 2b (for owners of the wired RPlate)
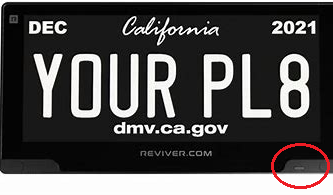 Your wired plate automatically connects to our servers multiple times per day. However, if you would prefer to have your plate update immediately, press and hold the home button (circled in the bottom image below) for approximately 10 seconds for the new plate image to upload.
-